

As a way to improve my portraiture, I volunteer to shoot head shots for my daughter’s school music productions for use in their programs. Now, I know that these will be tiny B&W images printed from a laser printer or copied on plain paper, but I also know that they will give the programs a much nicer look and there will be a lot of very happy parents.
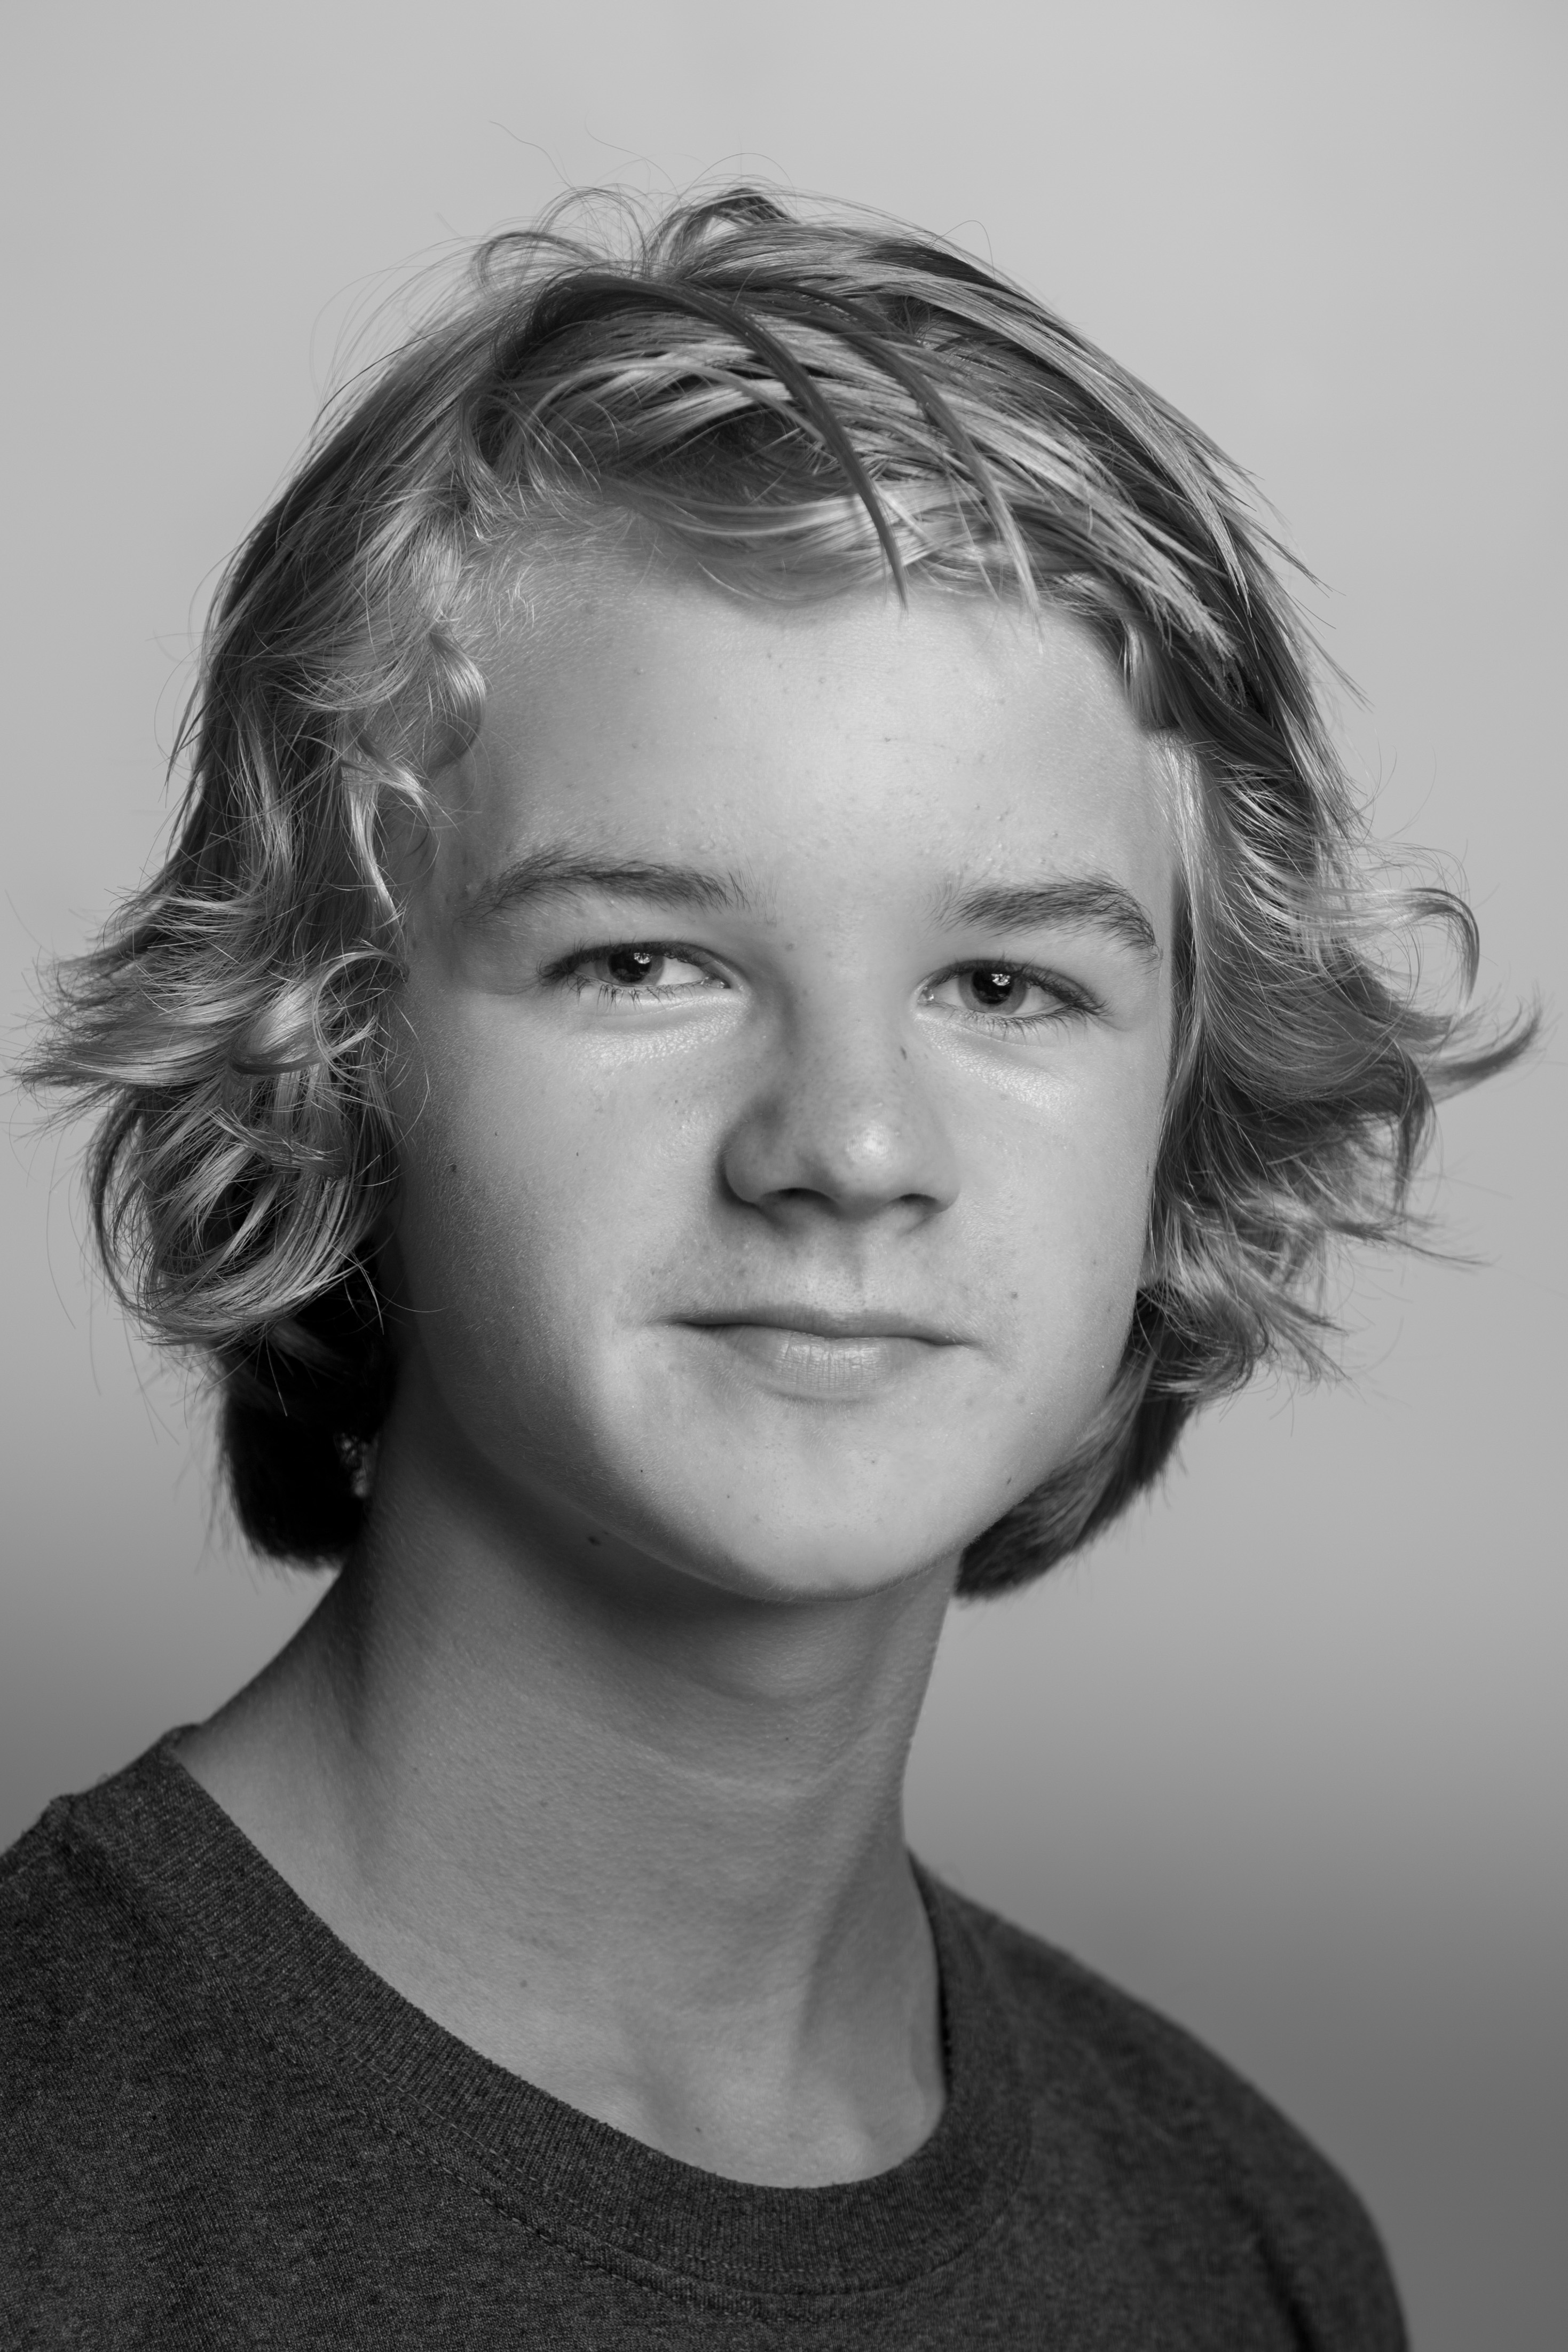
When I first did these, I experimented against a white board as background with a one light setup (umbrella and speedlight with radio trigger) and a single reflector (white) and made adjustments to position of lights for student height as well as for male/female lighting. The changes were subtle, but I was pleased with the results. The first shoot I think I shot close to 30 kids in barely an hour – so very rapid fire. Was a good exercise in managing light, time and subjects. (If you think getting 30 14-year old girls and boys to feel comfortable in front of the camera for a portrait is easy, then you have not done this!)
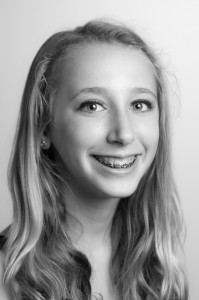
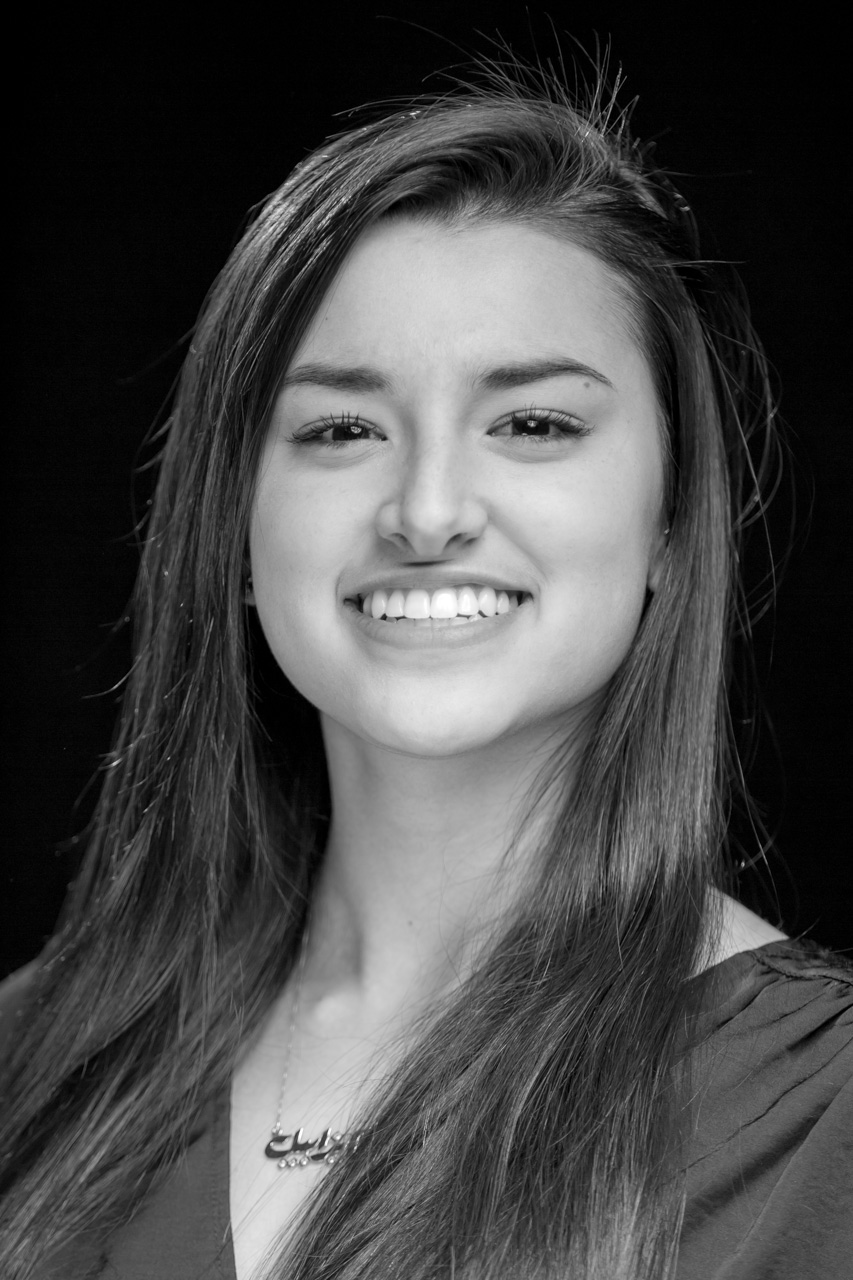
A few months later I was asked and then shot some older kids – but experimented against a black background for a low-key version. The images looked great – but as I suspected, did not print well at all on the mediocre laser technology the school used. I ended up re-processing to try to match the tonal range (bump up the blacks) and they actually looked decent in the programs. For this shoot – I went with a three light setup – all speedlights with radio triggers – hair/gird – fill / umbrella – key / umbrella. Shooting high schoolers was a tad easier than the younger ones, but I also learned (thanks to an observant assistant I brought along) to work more on my “bedside manner”.
Want to learn what I figured out?
The fact that I could control my speedlights on the camera gave me much more flexibility. I used Yongnuo 622Cs on my Canon 5D3 to adjust my three Canon speedlights which also had the 622Cs. This let me quickly set power levels and make adjustments when needed without running all around. I usually start with a 1/4 – 1/16 – 1/64 power for key – fill – hair shooting at about ISO 100 and 1/160. I went with a Canon 70-200mm f2.8 L IS II lens at 130mm and f2.8 for this. I also brought a small stool to stand on for some of the taller kids! I think I shot about 20 kids in about 45 minutes.
First, what I learned was that while f2.8 for a portrait can be a beautiful thing, nailing focus in a less than ideal space can be a real challenge. I was not able to shoot tethered, so was forced to chimp on the shots and the fact is, I missed focus on a few shots (which was not a big deal since I had to come back to redo some other shots anyway). Take note – the less time you have to nail a head shot like this, the more DOF you should give yourself if you can’t check and be absolutely certain about eyes being in focus. I still changed lighting slightly for gender specific shots – but all in all, a nice set if they were to be printed as 8×10’s even if not perfect for a school program.
Finally, I was asked to shoot more of the same age group from my first shoot – and since they had the previous images, I only needed to fill in the missing 20 or so kids. I opted to shoot them against the same backdrop, but decided to get smart about the previous two shoots. What was my plan?
- Shoot with three lights
- Do not change light locations once set
- Shoot with a wider DOF to minimize focus issues – f5.0 or so.
And, how did it go?
I was able to bang out all the shots in less than 45 minutes! By having the setup tested before starting and having tape spots for the kids feet (really important for these production shots!) – I was able to go through my process and get a bunch of great shots for the kids. I went with a grid for hair light and two umbrellas for key and fill and placed them at about 1 o’clock and 7 o’clock. I had a kid stand in to get the levels roughly set, then started the production.
My routine for each shot was almost the same:
- Leave camera on the table near shooting location.
- Walk over and greet the kids when they come in.
- Check their clothes to make sure they are ok.
- Walk over to the tape marks on the floor and jump onto them with both feet (being a tad goofy and relaxed)
- Show them how I want them to stand (shoulders over feet, turn head toward me)
- Let them to stand on the marks.
- Take a breath and look at them. Start talking to them about how great they look, etc.
- Do NOT pick up camera.
- Look at them again and ask them to fix hair fliers, tuck in bra strap, tighten shirt, etc. The more you can fix before you pick up the camera the better!
- If the kids are unusually tall or short, adjust light stands.
- Pick up camera and take the first shot – check to make sure levels are good, then check image for obvious issues (typically hair). Adjust light position of levels if needed. Repeat until a good candidate shot is there.
- Show shot to kid and let them make adjustments if they want.
- Shoot another shot or two and check and show kids these.
- Reshoot again, or all done!

Showing the kids a shot first can sometimes help with them getting comfortable and be happier with further images being taken, though some kids may either get more self-conscious or just be the same difficult subject. Most of the time, when I am happy with the image on the back, they are too. If I see a strange smile, I’ll show it to them and say “great shot’ what do you think?” If they don’t see what I see, I’ll just say – “hey, let’s just try this again with a different smile, ok?”. It is important to always be supportive, but you need to get them to look their best.
Of course, some kids will just not care or listen. There will always be that one kid with the dead-eye stare and not fix their hair (girls or boys) – and that is what their image will look like. I figure, this is the image they are going to use for their school program, can’t make them do something they don’t want to!
What are the benefits to all of this?
- I get experience photographing people (which I love) and taking portraits (which I love as well).
- I get to experiment with lighting techniques and environments – no client is asking for a specific shot – I decide.
- I help out my kid’s school
- I get to photograph my daughter*
- I get exposure by having every parent see my work – both those of their kids and the body of work.
* – Of course, my daughter did not like her shot from the production run, so I *had* to do a shoot at home until she was satisfied. The downside to teaching her some photography is that she has a much more keen eye, especially when it comes to pictures of herself!
Overall, a great bunch of sessions that yielded close to 70 head shots that I gave to the school and also to the kids/parents as well (if they wanted). Amongst the kids in the productions is a child who has some developmental issues with a forced smile that really in not all that flattering. I ended up capturing a lovely closed mouth ‘Mona Lisa Smile’ (as I call them) from him that his parents tell me is the best picture they ever have seen of him. That is what makes this all worth it.